Shari Carroll used some dies I did not have available but I was able to cut a frame by hand and then use an alphabet punch to punch a little Merry and I glued it on with matte medium.
This was a hard card for me on many levels but I always wanted to do a card like this with all these layers, so I was thrilled to see her step by step instructions in class.
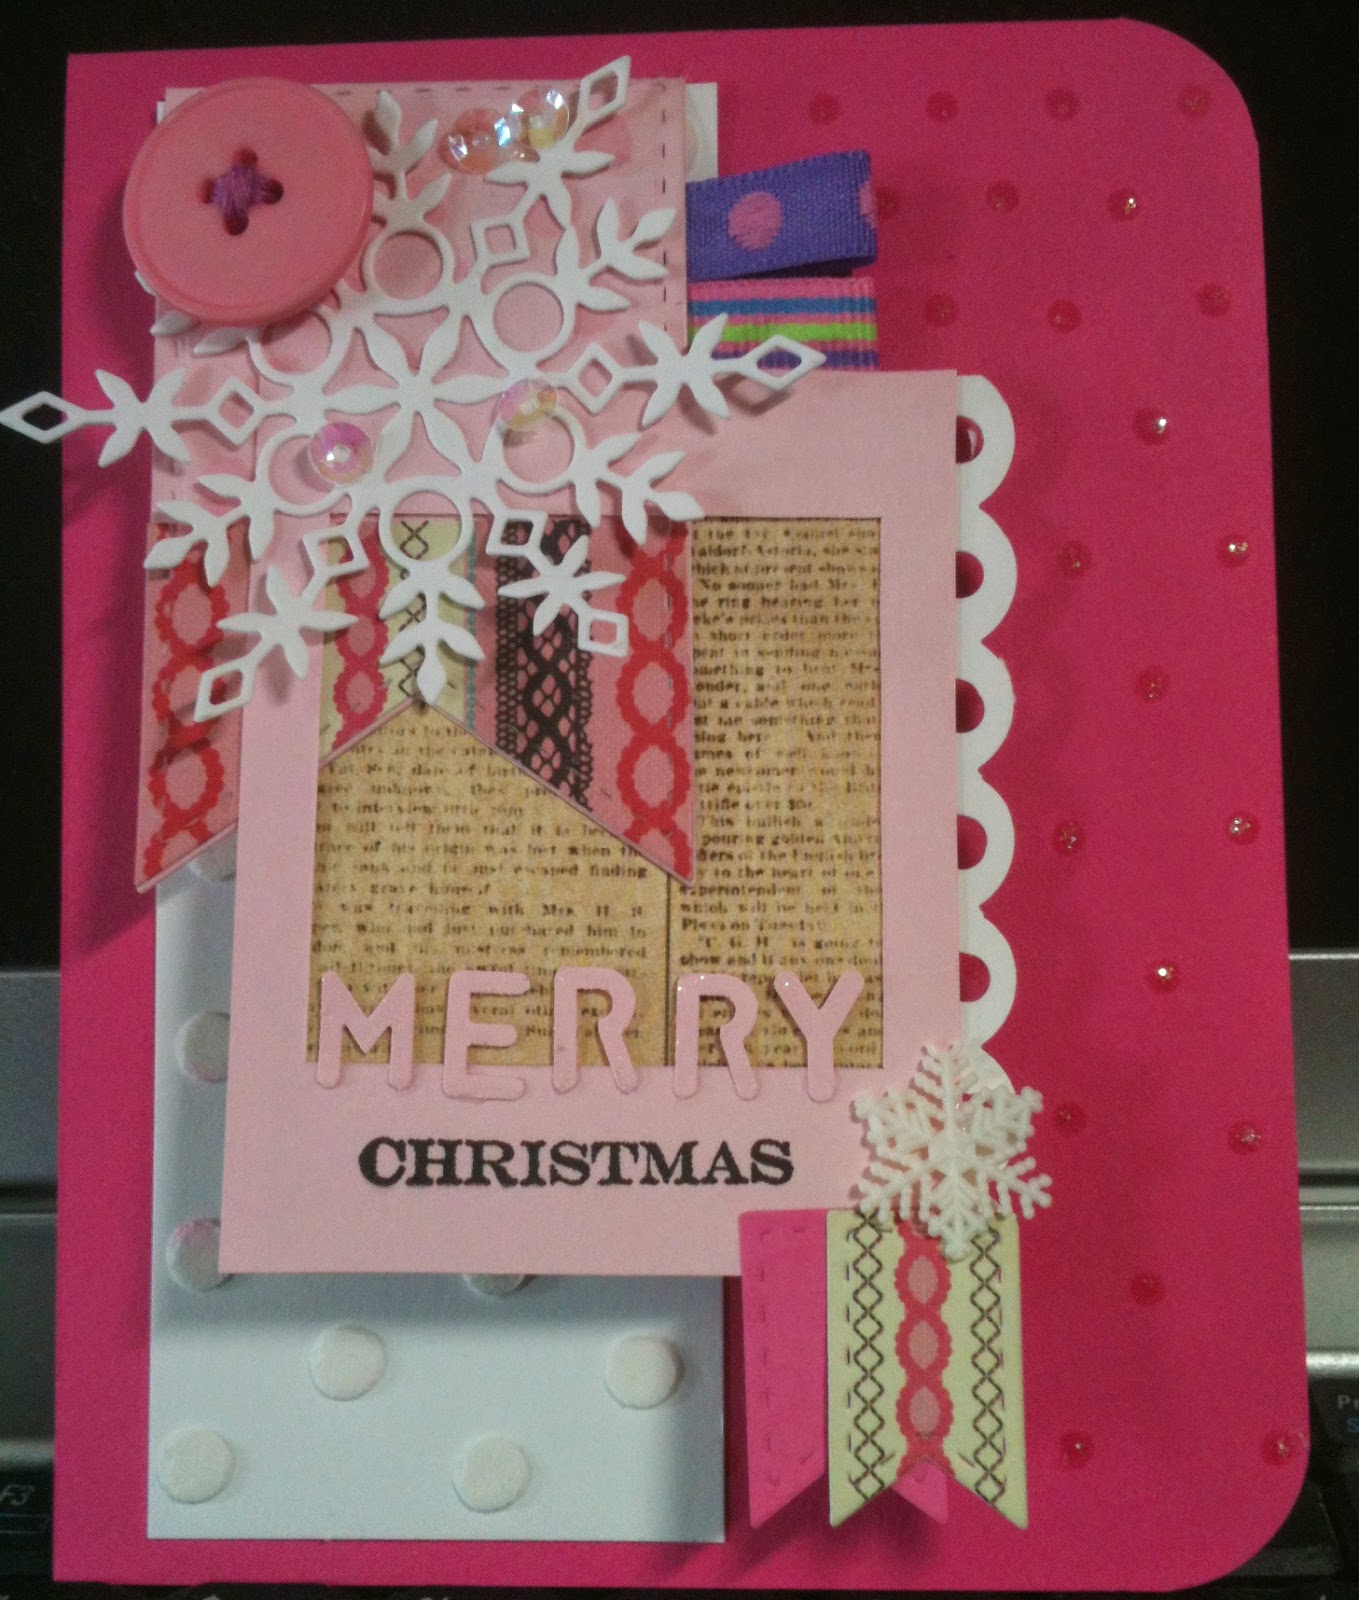
1. Texture paste on panel.
2. Cut out a banner shape using a die and leaving the top uncut. Stamped dots using pencil eraser.
3. Cut out an open polaroid shape, punch out Merry and glue only bottom of letters, and then back with small print paper sliding it up over the banner and then gluing in place.
4. Cut snowflake die image.
5. Button embellishment sew X with embroidery thread.
6. Cut small banner shapes adhere to polaroid panel.
7. Attach two folded ribbons to underside of flap and punched edge along side.
8. Attach gift card.
9. Stickles.
10. Sequins.

This looks great! It looks like a lot of work!!
ReplyDeleteGreat take on Shari's video and card and love the pink and details of this card along with the hidden gift card!
ReplyDelete